Building the galley hatch.
Next on the agenda was building the galley hatch. The galley hatch was possibly the hardest part to build. This is because you need it to match the lines of the trailer perfectly and you need it to be watertight. While the weight of it wasn’t too bad, the size of it meant I always wanted help moving it. That help wasn’t always around and I’ve lifted it too many times to count without help. Bulky is an understatement.
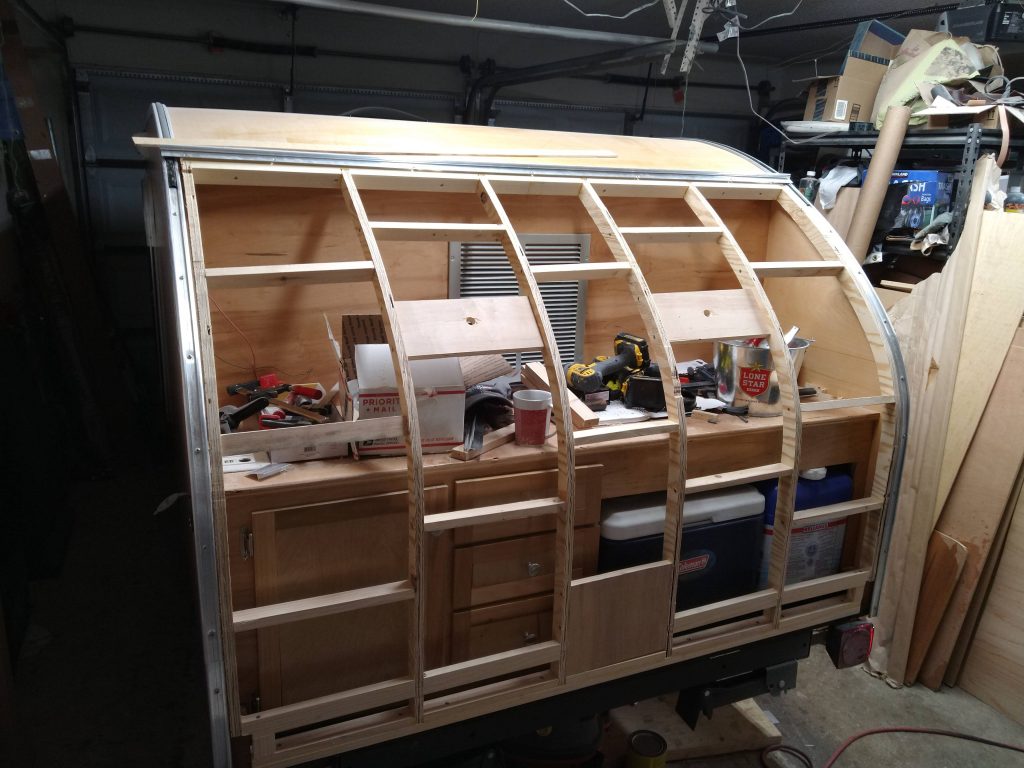
I started off with the ribs I cut out earlier in the project. After cutting out the walls using the template I created. I had cut down the template to make a template for the ribs. The ribs are created from 3/4″ plywood. The spars running in between them were made from the cutoffs from the roof spars. I did use two poplar 1×2’s at the top of the galley hatch for the hinge to attach too. The hurricane hinge is from Vintage Technologies, I’m using their HT06-01 Flat Hurricane Hinge w/Flat Bar. The flat boards showing in the picture below are scraps of birch plywood, they provide mounting points for the galley lights and for the locking mechanism.
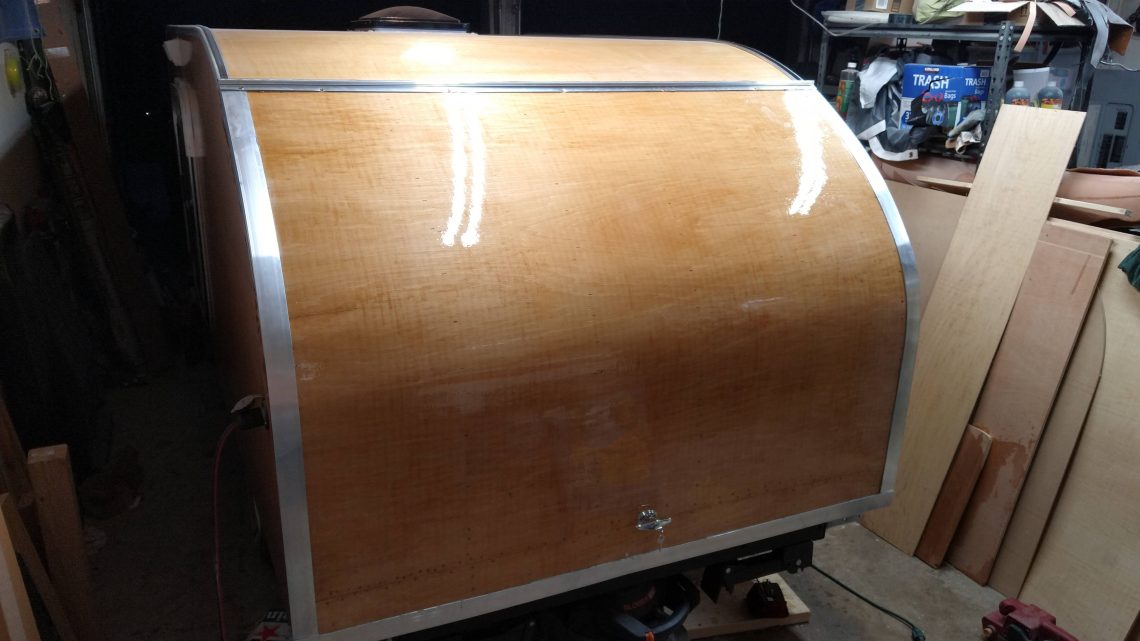
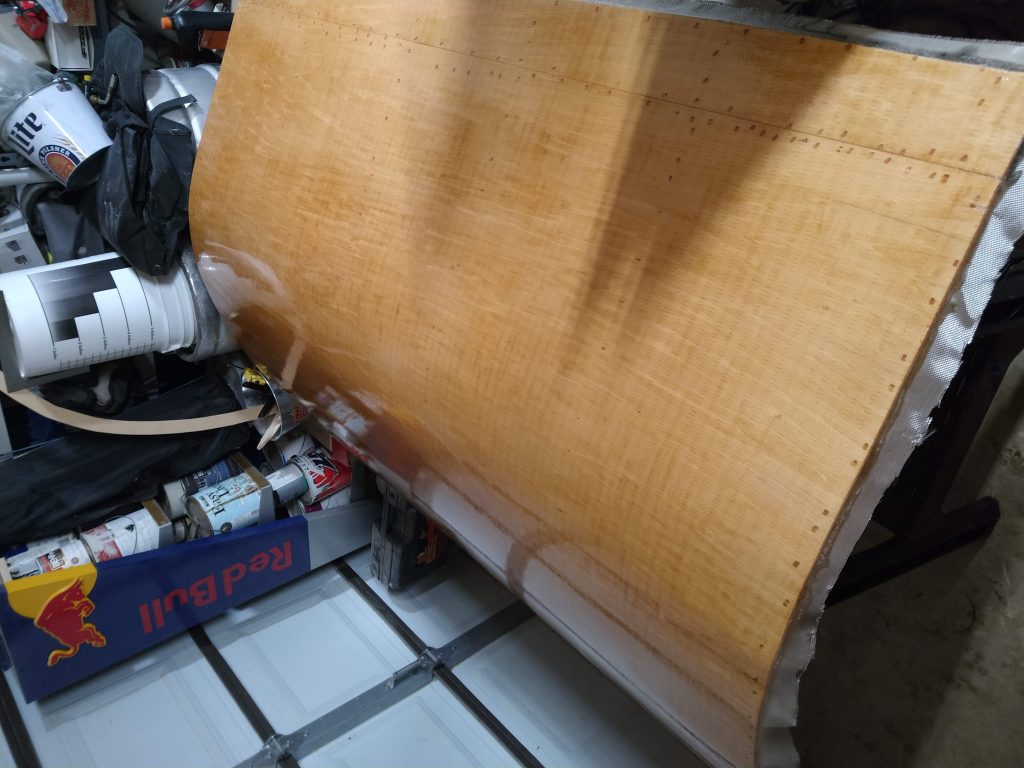
After getting the shape of the galley hatch sorted out, it was time to skin it. Just like I did for the roof I used 1/4″ bending plywood from Plywood Company of Fort Worth. I used glue and brad nails to attach the plywood to the frame.

Just as we did with the rest of the trailer the hatch was covered in 6 oz fiberglass and epoxy was used to give the galley hatch strength and to waterproof it. I used the same process as I did here http://michaelhoodjr.com/exterior-finish/
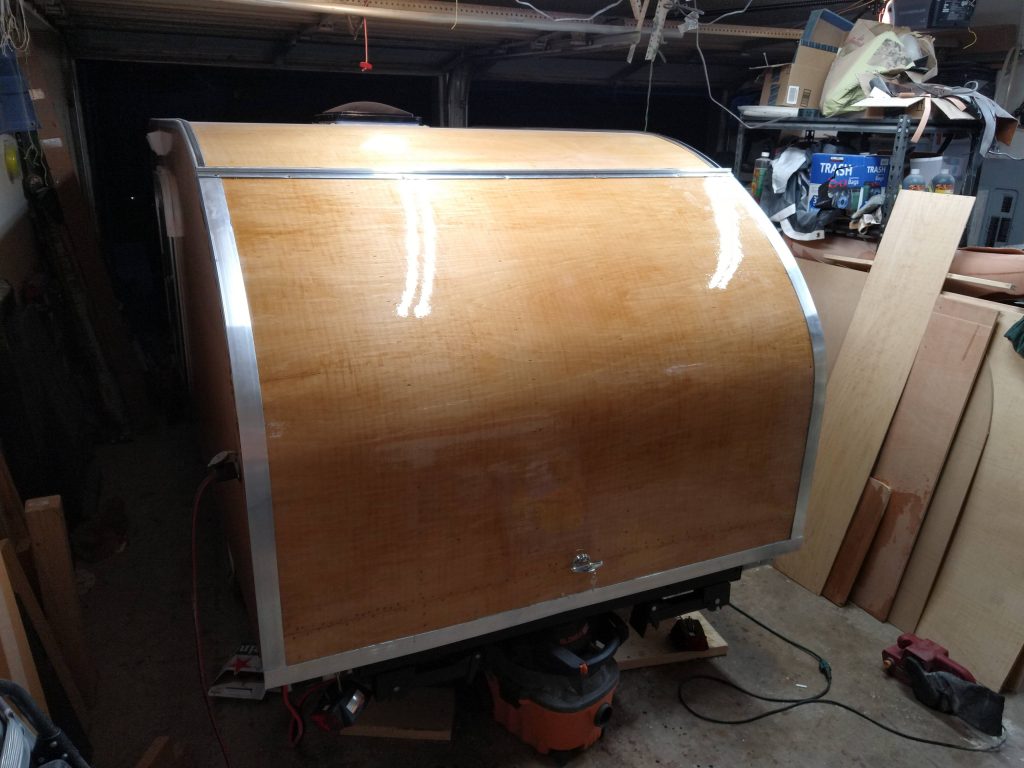
After the epoxy cured I mounted the hinge for the final time. Hopefully we lifted it in to place on trailer for the final time as well. The galley hatch was then trimmed with some offset T-moulding again from Vintage Technologies. I also installed one of their T-handle latch kits.
The tools I used during this process:
Dewalt Drill & Driver kit: https://amzn.to/2QcO4gj
Dewalt router: https://amzn.to/32CDAta
Freud flush trim router bit: https://amzn.to/2pVCtax