Corner Cabinet build
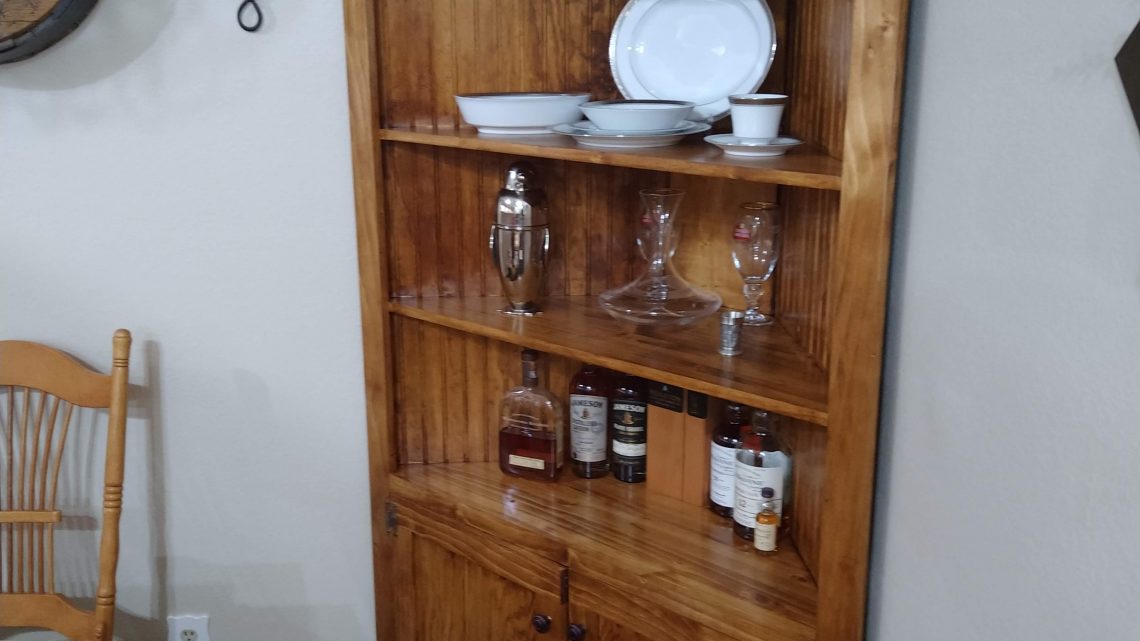
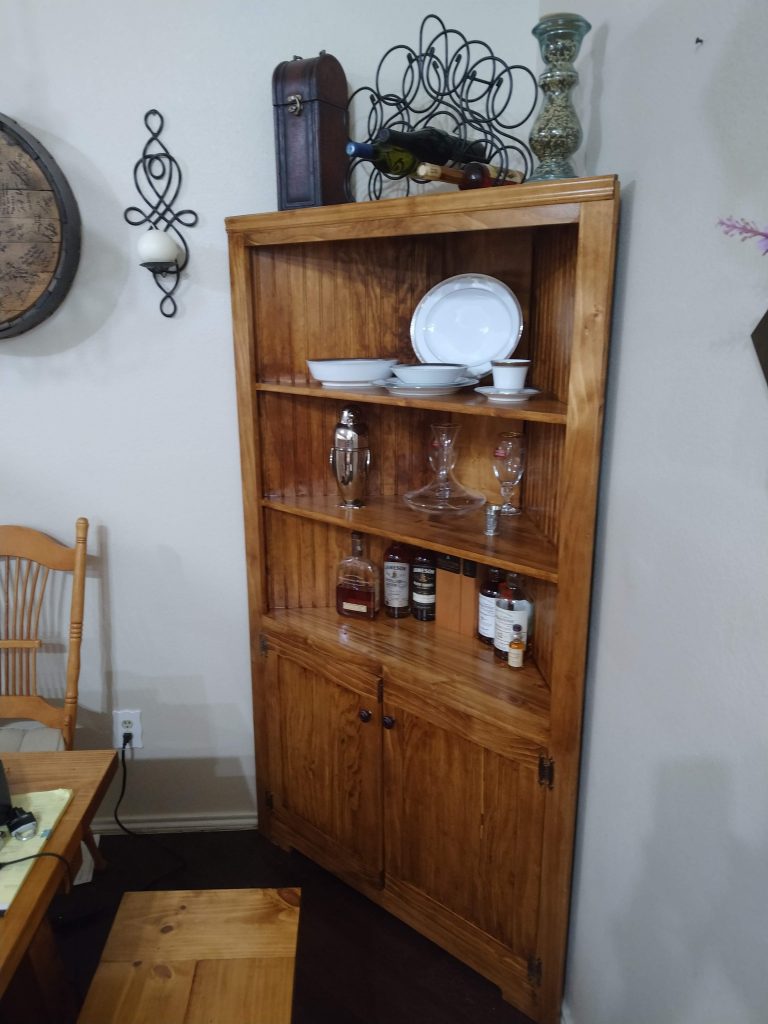
I finally got around to building the corner cabinet I promised my wife a year ago to build. I used a plan from Ana White again as I did with the Farmhouse Table I built. We really didn’t have a place to store our china that we received for our wedding. This solved that problem and gave a great place to store some other keepsakes and display some whiskies as well.
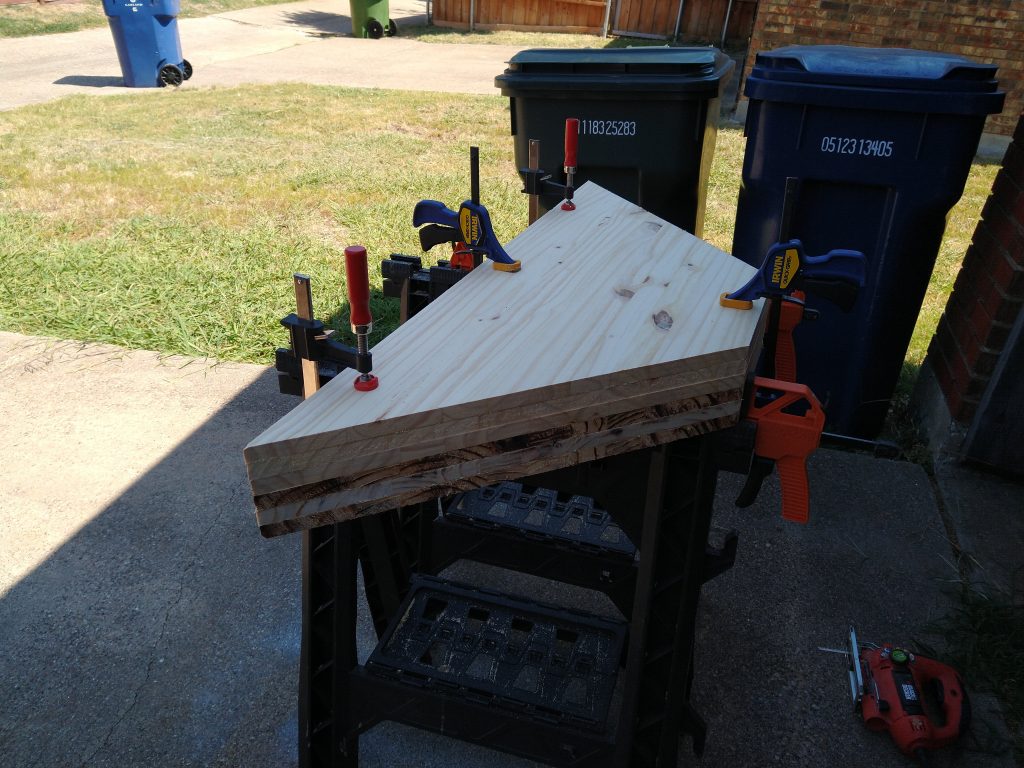
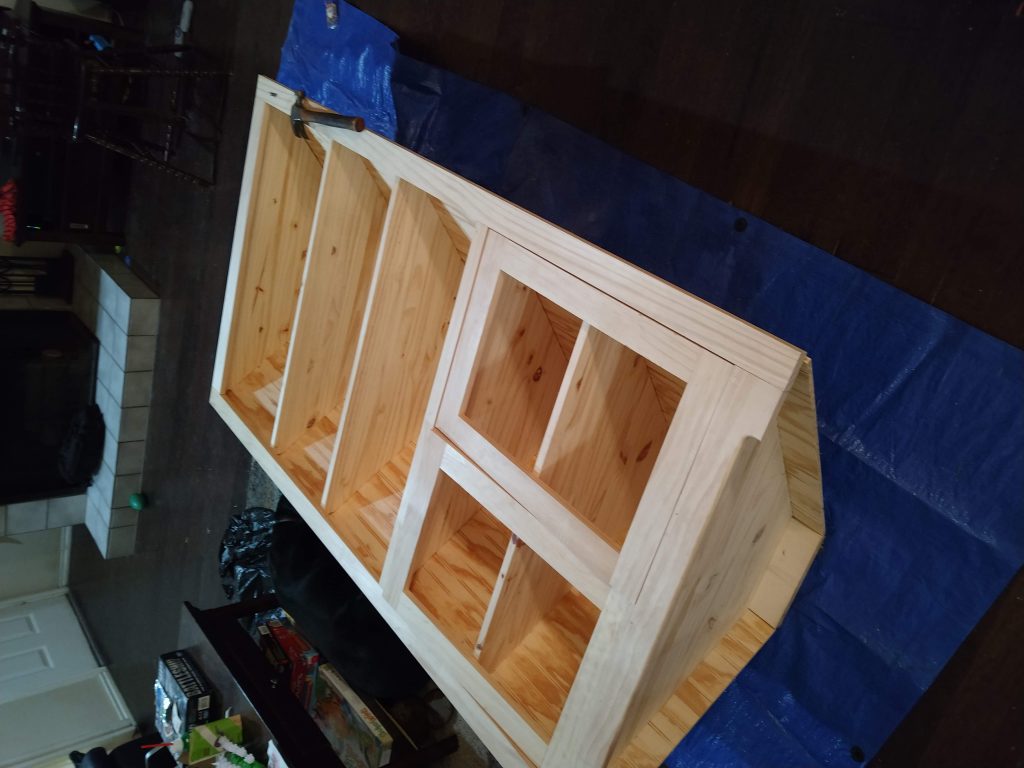
I started off by cutting out the shelves from a 1×12. Next I clamped them together and sanded them all to match. The shelves were then attached to the board that runs down back of the cabinet.
After fitting the shelves to the board running down the back of the shelves. I attached the front fascia boards. Next I cut out the panel beading that makes up the back of the corner cabinet. Following that I made a set of doors for the bottom of the cabinet.
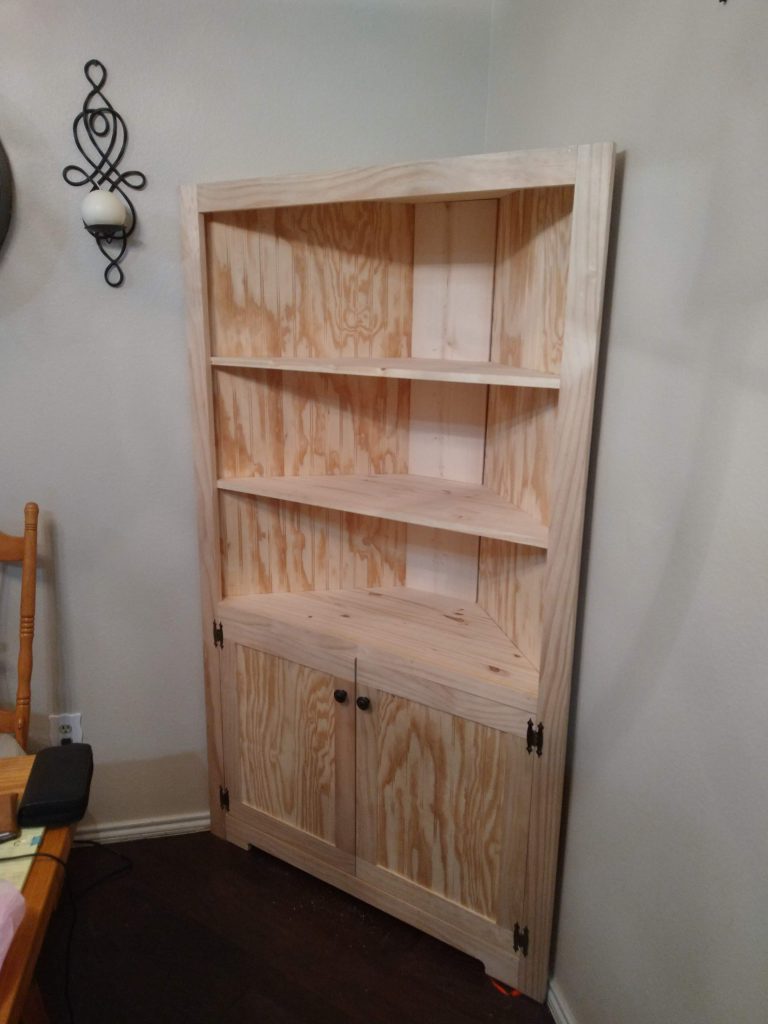
After fitting the cabinet with hardware. I placed it once more where we were putting it, to verify that it fit. Next up was the sanding and finishing.
Time for the finishing work. Starting off with the sanding, I started off with 80 grit and progressed my way to 120 grit, then 150 grit and finally sanding with 220 grit. The stain I used is Rustoleum Provincial. Following that I used three coats of polyurethane.
The tools needed for this:
The 80 grit sandpaper: https://amzn.to/36RpU0r
120 grit sandpaper: https://amzn.to/2NUzlUj
150 grit sandpaper: https://amzn.to/2pMyld2
220 grit sandpaper: https://amzn.to/36N2YQ3
The sander I use: https://amzn.to/2qBCUXD
Corner clamp: https://www.harborfreight.com/corner-clamp-with-quick-release-38661.html